Views
Views let you save named navigation shortcuts to specific regions of the Board canvas. Activating a View smoothly pans and zooms the Board so that the defined area fills your screen, no matter what device you are on.
Views are purely a navigation tool. They do not group, filter, or affect the tokens inside them. Visual grouping remains the responsibility of Group Widgets and other layout assets.
Any View can also be used as the target of a Module Anchor. When activated, the Anchor navigates to the Module and immediately zooms to the targeted View. See the Anchors page for details.
Creating a View
From the current screen
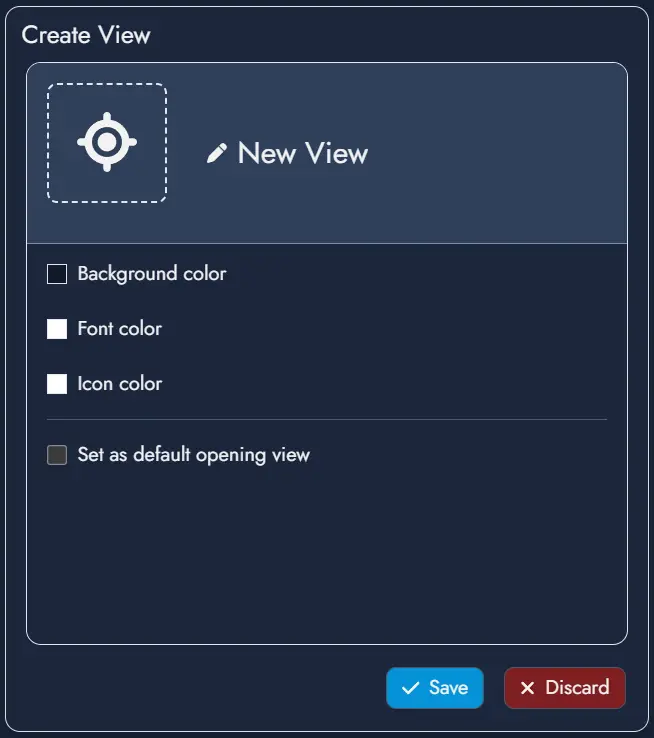
Click the Create View button inside the View Shortcut Dropdown, use the Save as View option in the Board's context menu, or press the keyboard shortcut (Ctrl + Alt + V). A creation modal opens where you can:
- Enter a name for the View (required).
- Set a featured image, and choose a background, font, or icon color.
- Check Set as default opening view to make this View the one the Board navigates to each time the Module is opened.
Confirming the modal creates a View using the current visible area of the Board as its boundary. The new View is added to the top of the Views list.
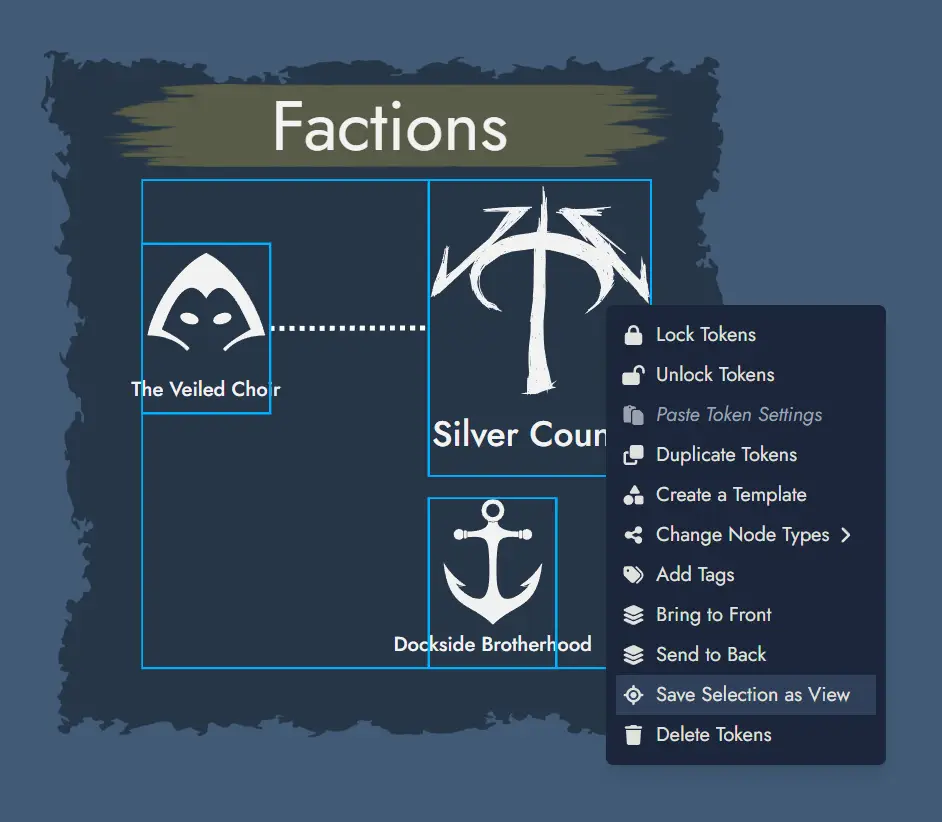
From a token selection
Select one or more Tokens on the Board, then open the context menu and choose Create View from selection. The same creation modal appears, including the Set as default opening view option. When confirmed, the View boundary is calculated from the bounding box of the selected Tokens, with a small automatic padding added around them.
When a single Token is selected, the modal pre-fills the View name and featured image from that Token's parent Asset.
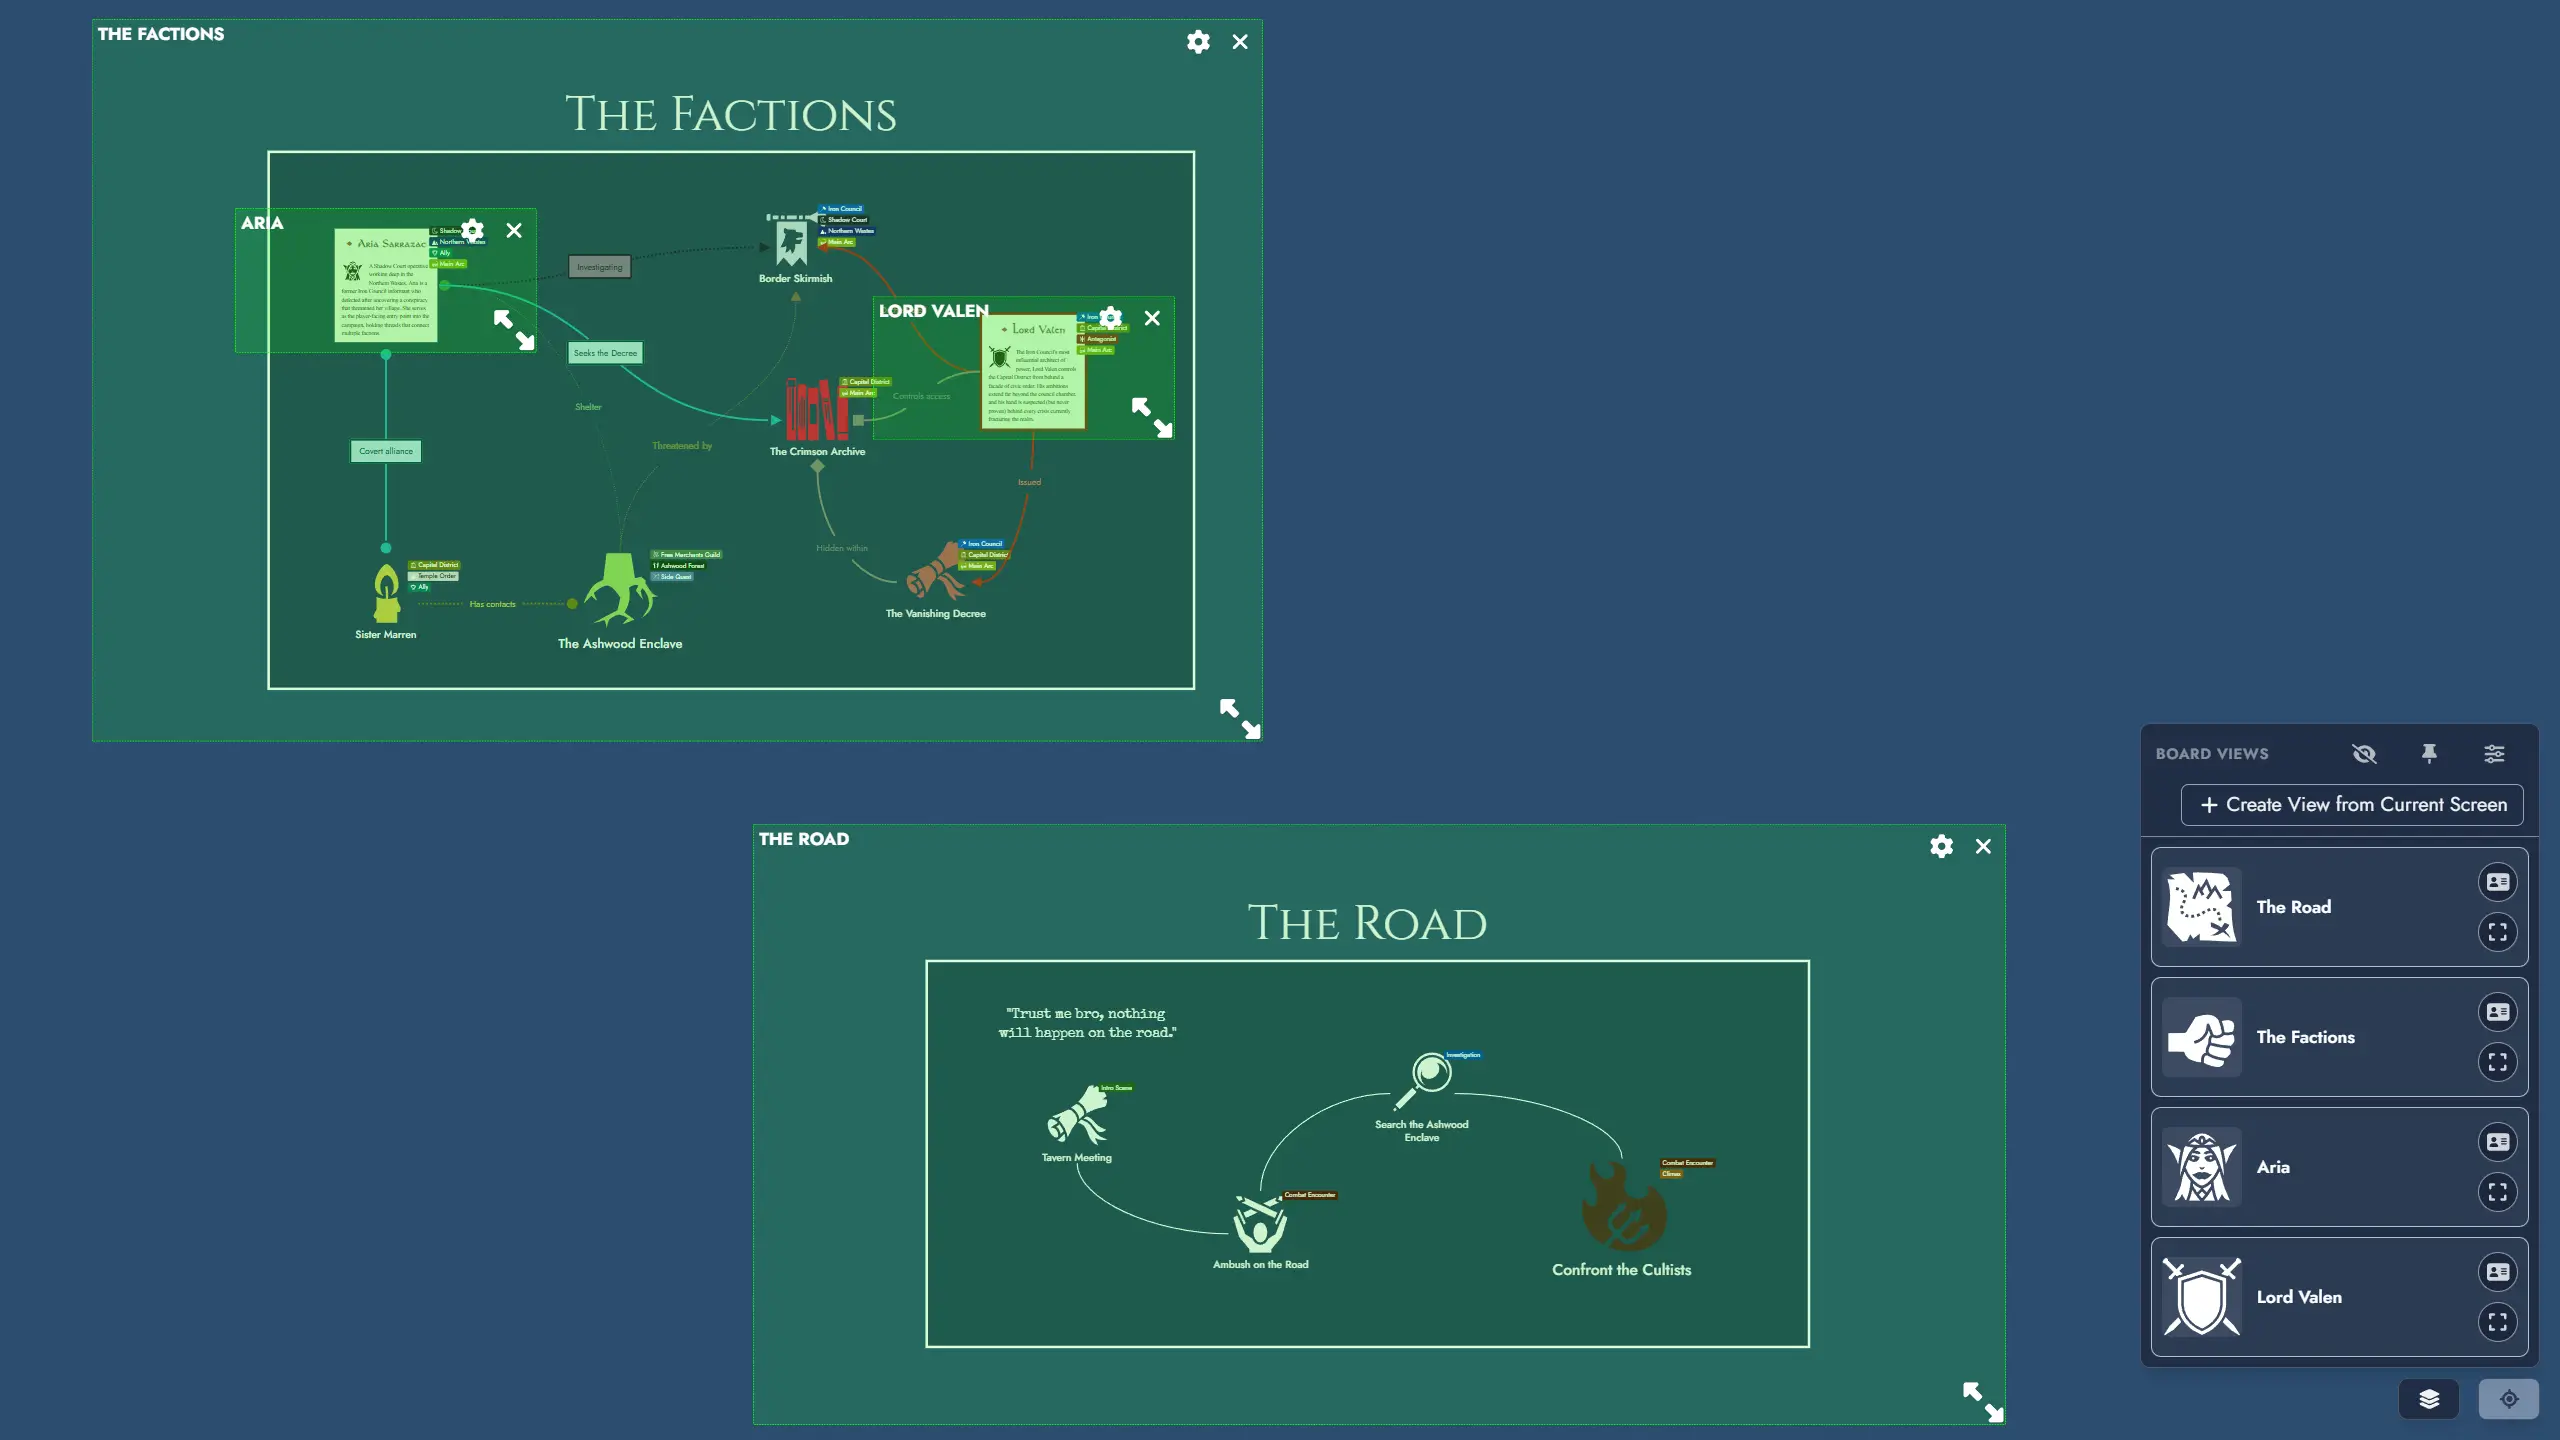
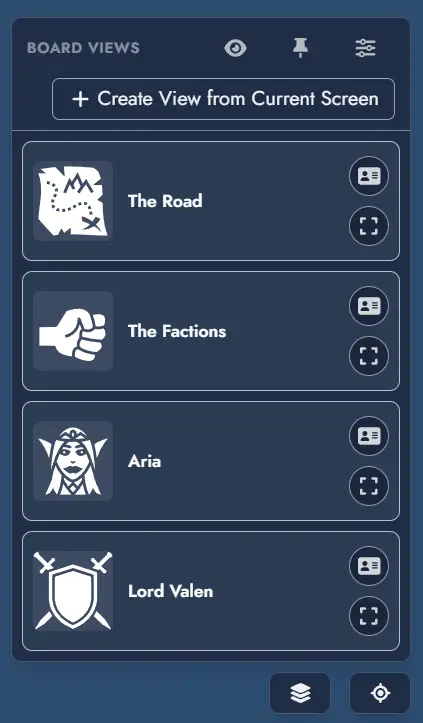
View Shortcut Dropdown
The View Shortcut button sits in the bottom-right corner of the Board. It is always visible, even if no Views have been created yet.
Clicking the button opens a dropdown listing all Views defined in the Module. Each entry displays its featured image, name, and custom color accents. Clicking a View entry smoothly pans and zooms the Board to bring that View's region fully into focus.
Each View card in the dropdown also features action buttons:
- Edit: opens the View edition modal, where you can update the View's name, featured image, colors, and default opening view setting.
- Show on Board / Hide from Board: toggles the visibility of that individual View Token directly from the list, without closing the dropdown.
A settings button at the top of the dropdown opens the View Manager.
Pinned Mode
The View Shortcut Dropdown has an alternative pinned mode that keeps View shortcuts persistently visible on the Board without requiring the dropdown to remain open.
Activate pinned mode using the pin button inside the dropdown. In pinned mode, the shortcuts are rendered as a compact vertical panel anchored to the right edge of the Board, directly above the View Shortcut button. Each View appears as a small button showing only its featured image.
The pinned panel also includes a collapsible menu at the top containing three actions:
- Settings: opens the View Manager.
- Show / Hide Views on Board: toggles the visibility of all View Tokens on the Board at once.
- Create: opens the View creation modal.
Clicking a View button in the pinned panel navigates to that View. The panel stays visible after navigation. To exit pinned mode, click the close button that replaces the View Shortcut button while the panel is active.

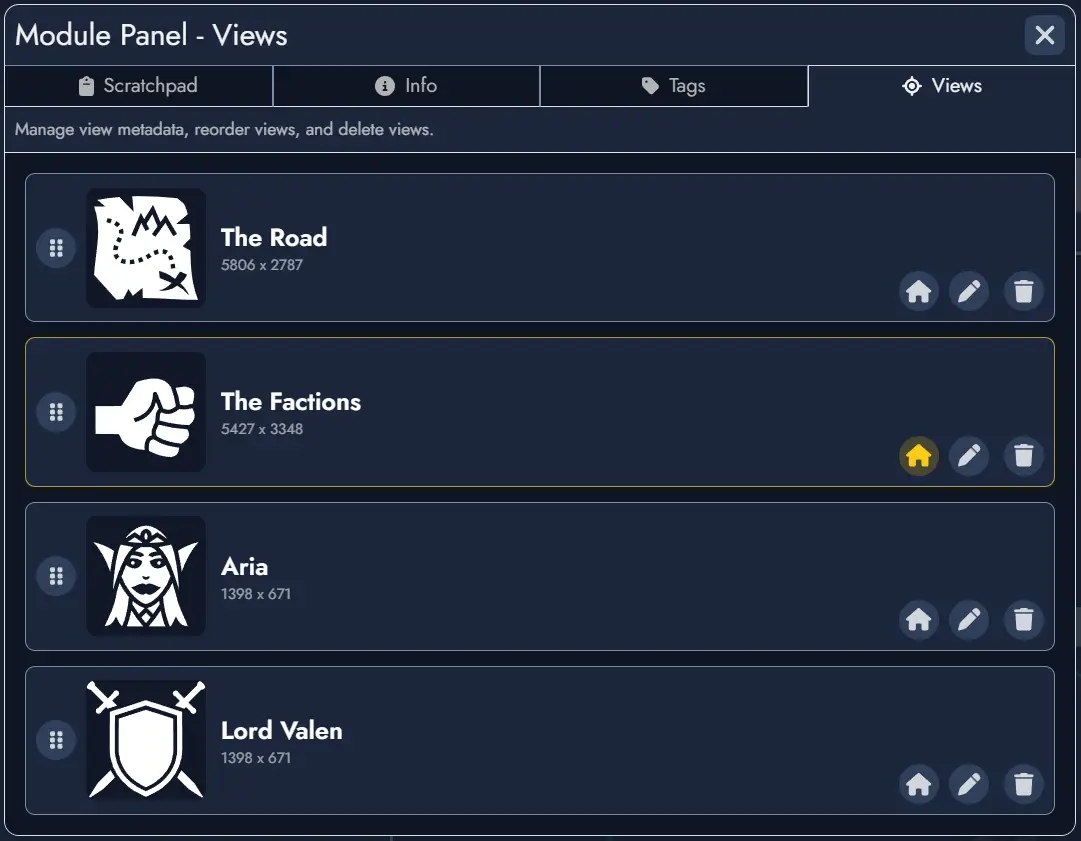
View Manager
The View Manager is a panel for managing the full list of Views in a Module. You can open it from:
- The settings button at the top of the View Shortcut Dropdown.
- The Board Settings panel.
From the View Manager, you can rename any View, update its featured image and colors, reorder Views by drag and drop, and delete them. The order defined here determines the sequence in the View Shortcut Dropdown.
You can also designate a default Opening View: when set, opening the Module will navigate directly to that View instead of restoring the last saved camera position.
Edit Mode
A View has no visible presence on the Board during normal use. To reposition or resize the area a View covers, enter edit mode for that View by clicking the Edit button on its card in the dropdown, or using the Show on Board button. This reveals the View Token on the Board: a transparent green rectangle with a resize handle, the View name, and two buttons:
- Edit: opens the View edition modal to update the View's metadata (name, featured image, colors, default opening view).
- Close: hides the View Token without deleting the View.
You can freely move and resize the View Token to redefine its boundary. Changes are saved automatically.
A global Show all Views toggle lets you reveal all View Tokens simultaneously for spatial reference or bulk repositioning. It is available as an option in the Board's context menu or as a button in the View Shortcut Dropdown. The label updates to Hide all Views when at least one View Token is visible. Turning it off hides all View Tokens again.
Opening View
You can configure which View the Board navigates to when a Module is opened. By default, the Board restores the last saved camera position (Last Position).
The Opening View can be set in three places:
- The UI Preferences section of the Board Settings panel, via the Opening View dropdown.
- The View Manager, using the dedicated option on each View.
- The View edition modal, using the Set as default opening view checkbox, accessible from the creation modal or the Edit button on any View card.
Sharing and Templates
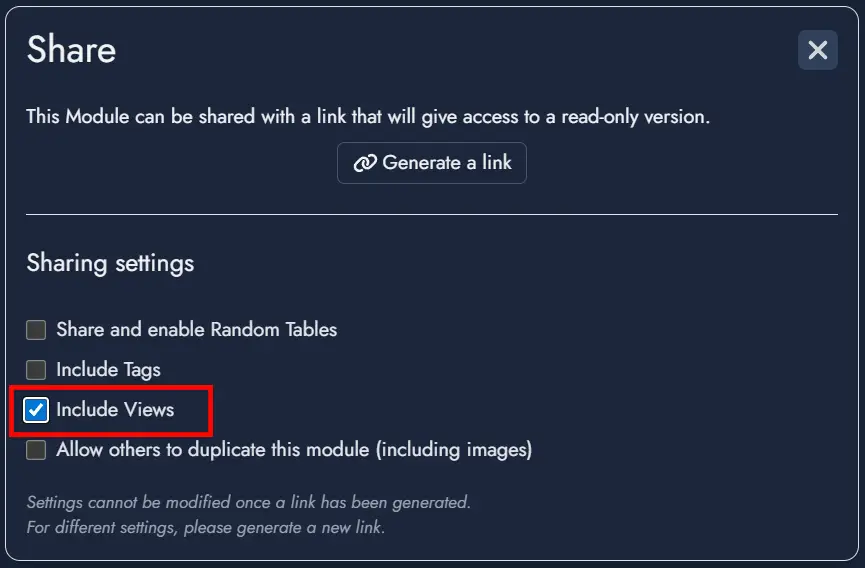
When sharing a Module via a read-only link, an optional toggle in the share settings controls whether Views are included. When included, viewers can use the View Shortcuts to navigate the shared Board. They cannot create, edit, reorder, or delete Views.
When exporting a Module as a Template, an optional toggle in the export dialog controls whether Views are packaged with the Template. When included, Views are restored when the Template is used to create a new Module.