
Exporting
The Exporting feature allows you to export your Module in various formats. To access it, click the "Export" button located in the Board's toolbar. This will open the "Export Module" window, where you can choose from the available export options and customize what to include:
- Export format: Choose between different file formats:
- Obsidian Markdown: Markdown with wikilinks between your Pages and sized image embeds, optimized for direct integration into an Obsidian vault.
- Markdown: A clean Markdown format suitable for most text editors.
- HTML: A raw HTML file that can be opened in browsers or HTML editors.
- Raw Text: A simple text version of your Module.
- Root Page: Includes your Module's top Page from the Editor. The Pages nested under it are exported either way.
- Images: Downloads the images used in your Module into an images folder beside your Pages.
- Notes: Includes Node-specific notes in the export.
- Scratchpads: Adds the Module and Node scratchpads (optional).
- Image width: Sets the default width (in pixels) for exported images.
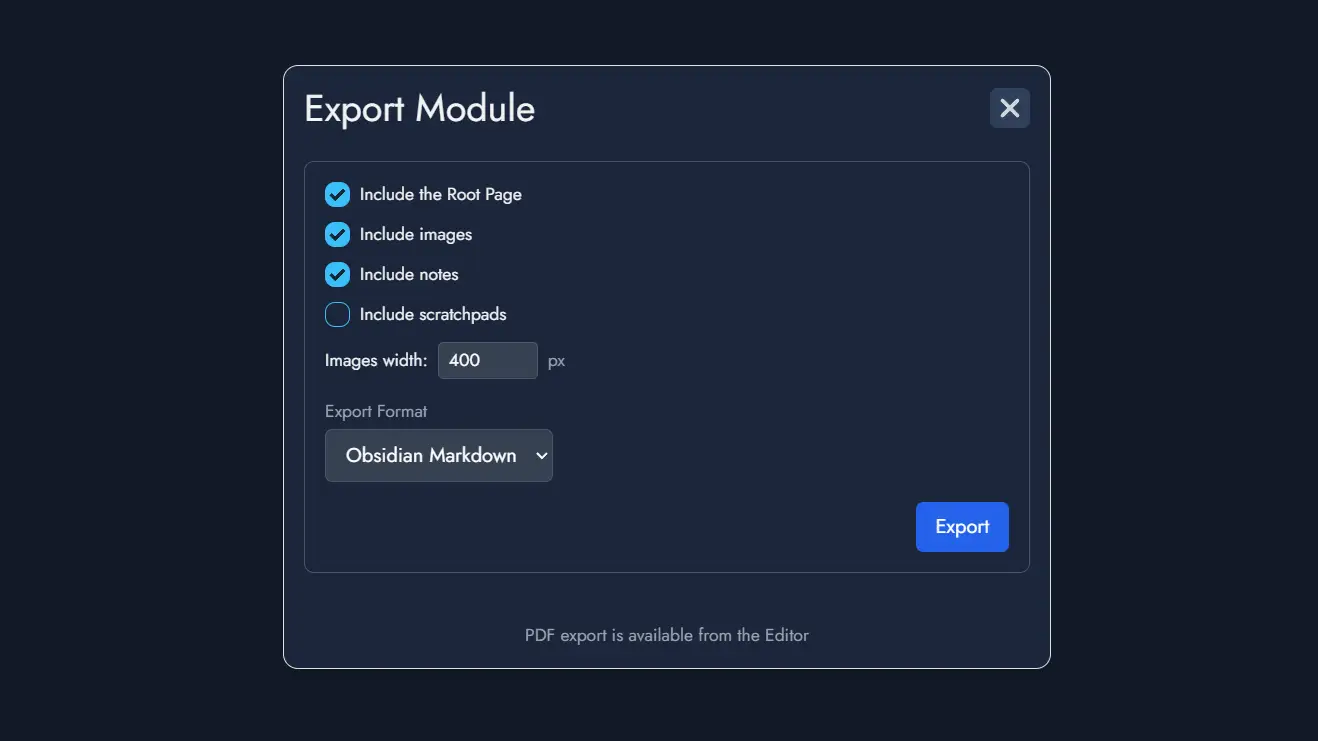
The window shows the name of the file you are about to get. When you're ready, click the Export button to download a ZIP archive containing your exported content.
To print your Module or save it as a PDF, use the Open Print Preview button in the Print & PDF section at the bottom of the window. See Print Preview below.
NB: Exporting the Module as an Alkemion Studio Template can be done with a dedicated button in the top toolbar, right next to the Export button.
Print Preview
The Print Preview lets you prepare the Pages of your Module before printing them or saving them as a PDF. It arranges your content across printed pages automatically, and updates as you make changes.
You can open it from two places:
- The Open Print Preview button of the Export Module window.
- The print button at the top right of the Editor.
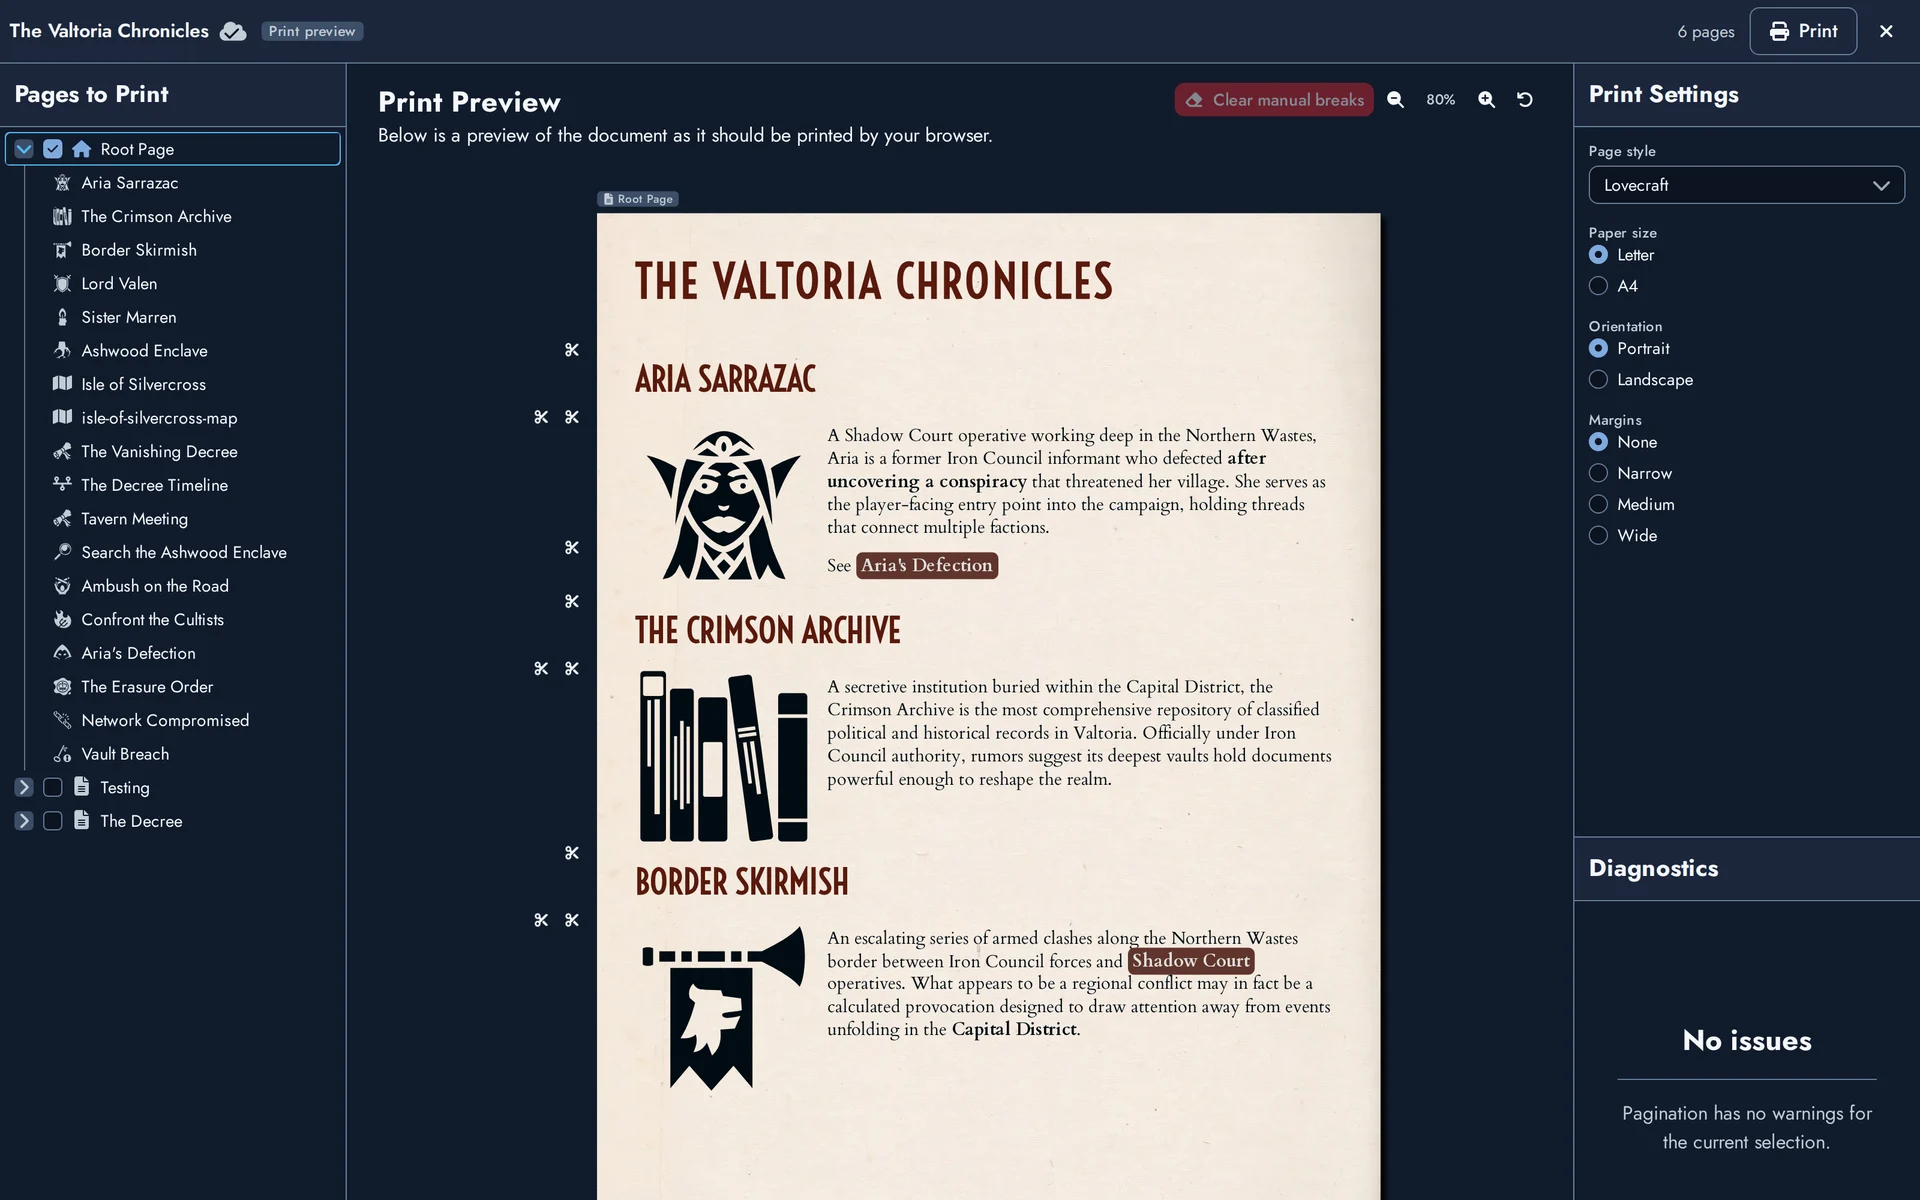
The Print Preview is made of three columns:
- Pages to Print, on the left, lists the Pages and folders of your Module, with their Content Blocks.
- The preview, in the center, shows the document as it should be printed by your browser, sheet by sheet. The zoom buttons above it let you adjust the display to your convenience.
- Print Settings, on the right, holds the paper options and a Diagnostics panel that warns you when something cannot be laid out properly.
The dividers between the columns can be dragged to resize them. When the preview is recalculated, an Updating the preview… message is displayed for a moment.
Choosing What to Include
Check the Pages or the whole folders you want to print in the Pages to Print tree. Checking a folder selects everything inside it. Click a Page in the tree to jump directly to it in the preview; hovering a Content Block highlights it there.
Only the Content Blocks that are visible in a Page are printed. You can show or hide a block from the context menu of the tree, without going back to the Editor.
Setting Up Your Paper
- Page style: the style used to render the printed pages.
- Paper size: Letter or A4.
- Orientation: Portrait or Landscape.
- Margins: None (the Page style's background covers the whole sheet), Narrow, Medium or Wide.
Adjusting Page Breaks
Page breaks are managed directly in the preview. You do not need to place your cursor in the Editor.
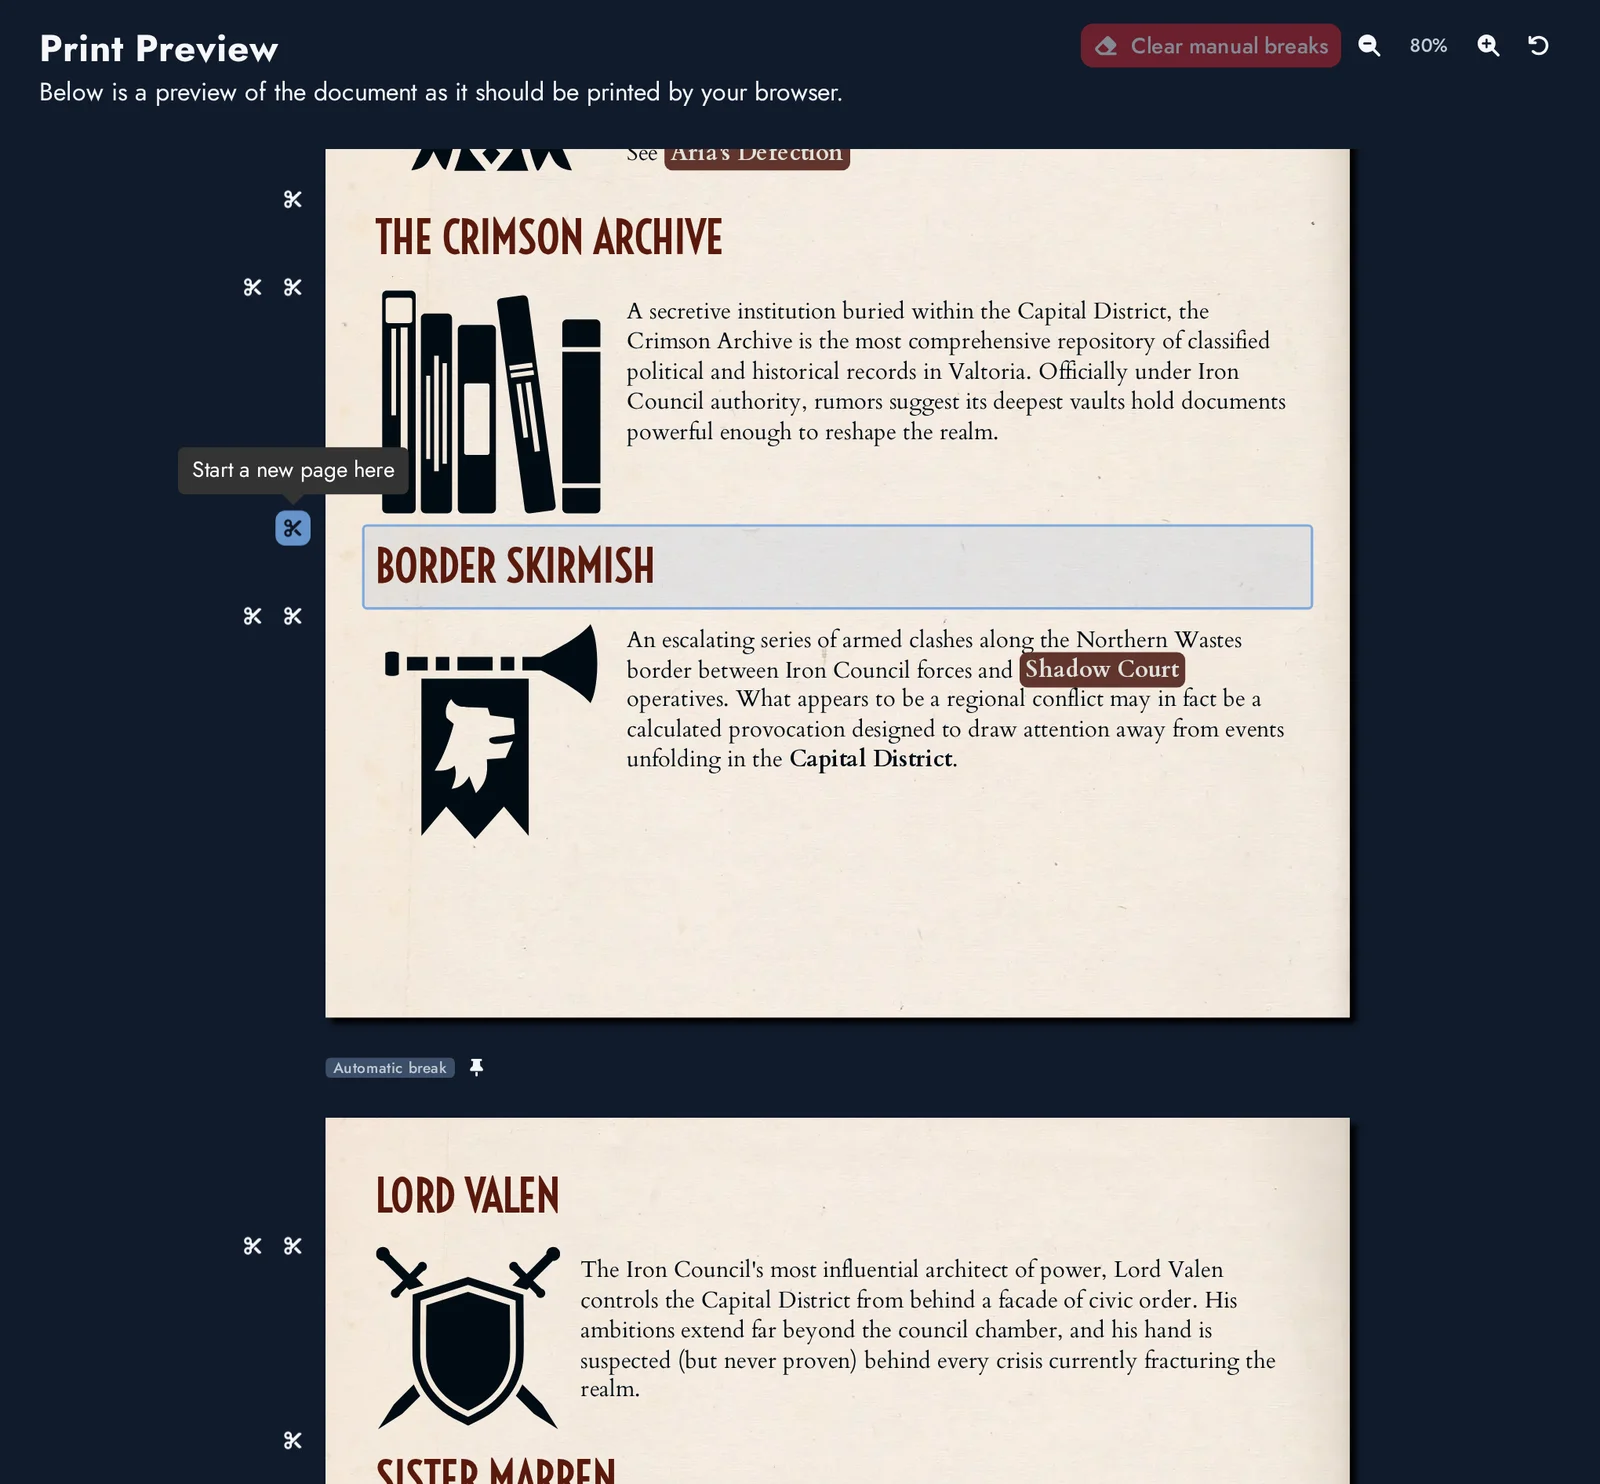
- The content is split into sheets automatically. Each automatic boundary is marked with an Automatic break label between two sheets, and each new Module Page starts with a label showing its title.
- Scissors buttons in the left margin mark the places where a new sheet can start. Click one to start a new page here. Hovering a button highlights the content that would move to the next sheet.
- The pin button next to an automatic break turns it into a manual break, so that it stays where it is when the content above it changes.
- A manual break can be removed with the button displayed next to its Manual break label. Clear manual breaks, above the preview, removes all of them at once.
Manual breaks follow your content: they stay attached to the same place when you move, copy or reorder Pages and Content Blocks.
Printing or Saving as PDF
The number of sheets is displayed next to the Print button, at the top right of the window. Click the button to open your browser's print dialog, then print the document or choose Save as PDF as the destination.
Readers of a shared Module can open the Print Preview and print it too, when the Allow others to print this module option was enabled in the sharing settings.